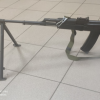
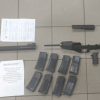
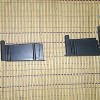
The SRX (SCAR Rail Extension) developed and manufactured by Primary Weapons Systems, Inc arrived to the gun market quite recently. But it has already appeared on few photos from flash points around the world and was generally recognized by marksmen. Those additional 5 inches (127 mm) of Picatinny rails provide the flexibility of SCAR SSR but with less weight and remained quick barrel swap feature. The whole construction can be quickly taken down if needed. To use the short CQC barrel, for instance.
For some shooters the length of the standard rails could be enough. In my case it's all came from the bipod. The photo below speaks the best:
If the bipod is placed on the standard rails, the centre of it would be to far from the muzzle end. Which makes the aiming more difficult and lowers its effectiveness and handiness (but the individual anatomic features are also should be taken into account).
Besides the SRX provides more space for placing all those flashlights, lasers, AN/PEQs and other accessories in order which better suits you. So after all it enhances the overall ergonomics and comfort of the rifle. You can also use the bipod and front grip of your choice in the same time.
Another important thing in use of a real SCAR is the charging handle emplacement. PWS SRX provides the full combat effective manipulation, no matter on which side the handle is. More about this from Travis Haley:
Now lets move on to the licensed PWS SRX airsoft copy from MadBull Airsoft.
First of all - compatibility. The MadBull PWS SRX fits:
VFC SCAR L/H
WE SCAR L/H
Dboys SCAR H
Echo1 SCAR H
not compatible with:
Classic Army SCAR L
Dboys SCAR L
Echo1 SCAR L
Technical data:
length: 5" / 127mm
upper rail length: 2.7" / 69mm
diameter: 2.25" / 57mm
weight: 230 g
material: T-6061 aluminium
coating: black oxide
package includes: SRX, adapter, 4 hex screws
The package looks like this:
No instruction inside, although with such a simple installation and amount of manuals available on the web, that would be a waste of paper.
The overall quality as always is on a really high level. All lines and edges are machined with high precision. The coating is firm and ruggedized. No flaws or defects detected. Despite the dimensions of the handguard extension it's quite light. And doesn't feel like adding any weight to the rifle after installation.
The markings are just like the original ones, except the small text "FOR AIRSOFT ONLY" added on the bottom of the left side. But it's smaller than the text above hence hardly noticeable if you're not specially looking for it.
There're 2 QD swivel slots on both sides of the SRX. But the one G&G swivel I have appeared to be too thick to plug in. I think there will be no problems with MadBull's swivels though.
Installation
I want to apologize in advance for all that dust that become visible after using my camera flash.
And the other thing are those marks and "scratches" on the SRX's coating, which I also noticed while viewing photos. They are not actual damage of the body finish, but marks left by accessories I have put instead. For example, that long trace on the bottom rail left by bipod's coating. After cleaning the SRX with gun oil there was no visible marks left. You can see the strength of the coating on this Daniel Defense M4A1 RIS II torture test photo.

The coating, by the way, deserves special compliments because no matter how hard I've tried to scratch it with screwdriver, it withstood those tortures and stayed black on the marks. Only when I applied maximum pressure I could get to the metal (from right to left as pressure increased).In fact, you need to hit it hard to scratch the coating significantly, I think it bounds with body breakage of your rifle. Other hits to the ground, concrete, metal or tearing it by your gear which often take place on airsoft games will only lead to barely noticeable marks without affecting the coating much.
First you need to unscrew the 2 torx screws on the sides of rifle rails. They have springs beneath them, so they stay in place.
Next - 2 hex screws on the handguard bottom rail. After you finished unscrewing the outer barrel will become loose, but you don't need to take it off anyway (the photo is only for demonstration). Same thing for barrel extension, it's better to be in place, so you won't damage inner barrel during the process.
Remove the barrel yoke from upper receiver and slide the SRX yoke into place. Now you need to screw everything that was unscrewed in reverse order. Tighten the 2 hexs to secure rail to the barrel yoke and barrel extension.
You might want to add few drops of threadlocker on those, because there's a risk they will get loose by the time (especially the front one). In my case the front hex covered by the bipod.
Tighten the 2 torx screws on the SCAR side rails.
Now when SRX yoke secured by screws from all sides it's time to finally slide the SRX itself on it. The QD Sling swivel points will be toward the rear of the weapon. Both parts are machined with such a precision that there's no slackness in between and no need in applying any force to slide it in place. But the gas regulator can get in the way on the right side. Just rotate it a bit (as shown below) and once the SRX is in place - turn it back to the original position. Tighten the 4 supplied screws and it's done.
That's it. The PWS SRX is successfully installed and isn't interfere with the front sight or gas nub. SRX's top rail is a bit lower than the one on the SCAR, so any of your AN/PEQ's or other devices you put on won't obscure the sight's view.
For those who prefer video manuals there is one:
It's also nice to know that besides all of the tactical features, the MadBull's PWS SRX inherited almost identical installation process from its RS prototype: PWS SRX Installation Instructions [PDF].
The difference in the shades of black mate are not that noticeable (it's more of the camera flash effect). Although it is also present on original PWS SRX.
Considering all above, PWS SRX - is now the most tough and precisely made part on my Dboys SCAR-H
Thanks to Rain, Zabielin and Mekk Sendman for photos.


 Навигация
 Категории
 Метки
Метки

